Your whole family is going to love this gorgeous Easter craft.
My favorite Easter tradition has always been dyeing Easter eggs. I’ve always loved the magic of dipping white eggs into little pools of color, peeking every now and then to see if the shade was to my liking, and then finally pulling out an egg transformed to a bright happy perfect representation of springy goodness. I love having kids for many reasons, one of which is the excuse to dye Easter eggs each year. Who’s to say I need to put color on edible eggs for it to be as thrilling? Just as there’s something magical about dying Easter eggs there is also something magical and surprising about marble painting. Just as the shade of an egg dipped in dye is sometimes a surprise you never quite know what swirls and twirls of color you’re going to get when you lay the paper into the marble paint. I’m pretty sure my girls and I could have marble painted our way through dozens of eggs and flowers, if only that pesky dinnertime hadn’t gotten in the way of our fun.

Supplies Needed to Make Marble Painted Easter Eggs
- Foam Shaving Cream
- Food Dye (liquid water color paints can also be used)
- Baking pan
- Stick (we used a chopstick)
- Ruler
- White Cardstock Paper
- Scissors
- Ribbon (optional)
- Hole Punch (optional)
How to Make Marble Painted Easter Eggs
1. Download the printable Easter Egg and Spring Flower PDFs. Print the Easter egg and/or flower shapes onto the cardstock. There are two flowers or eggs on a sheet and you can print as many copies as you would like to make. Cut the shapes out just inside the black lines so no black shows when they are cut out.

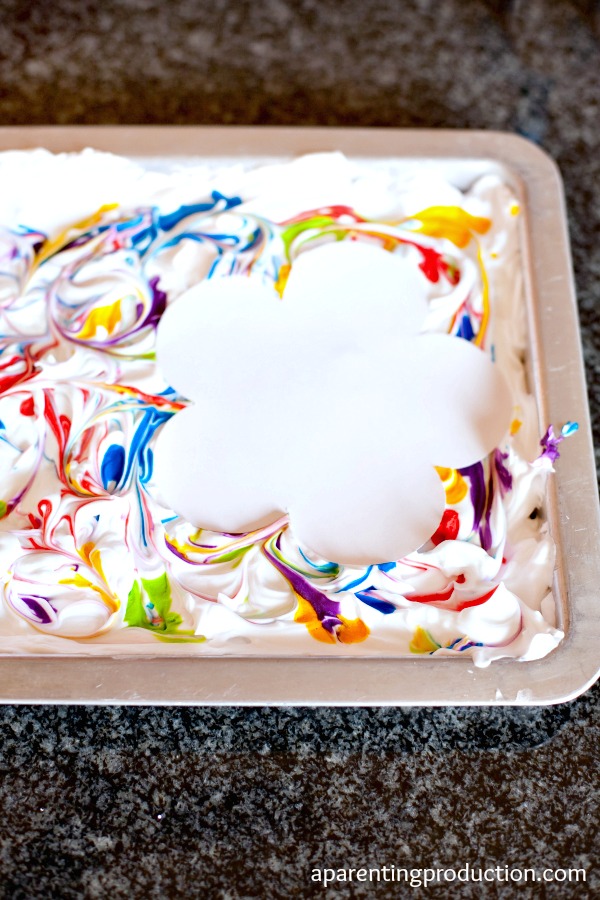
2. Spray a layer of shaving cream into the baking pan. Use a fork to gently smooth out the surface of the shacing cream. Drop food dots of food coloring around the surface of the shaving cream. We used neon food colors to get a brighter more spring-like feel. Swirl your stick through the shaving cream, drawing it through the dots of food coloring to swirl the colors around and create a marbled look on the surface of the shaving cream.

3. Place your Easter egg or spring flower on top of the shaving cream and gently press it evenly into the surface making sure to have the whole shape make contact with the colored shaving cream. Gently peel the paper up from the shaving cream and set it face up on the counter.
4. Using the flat edge of the ruler scrape the shaving cream off of the paper. Set the shape aside to dry.

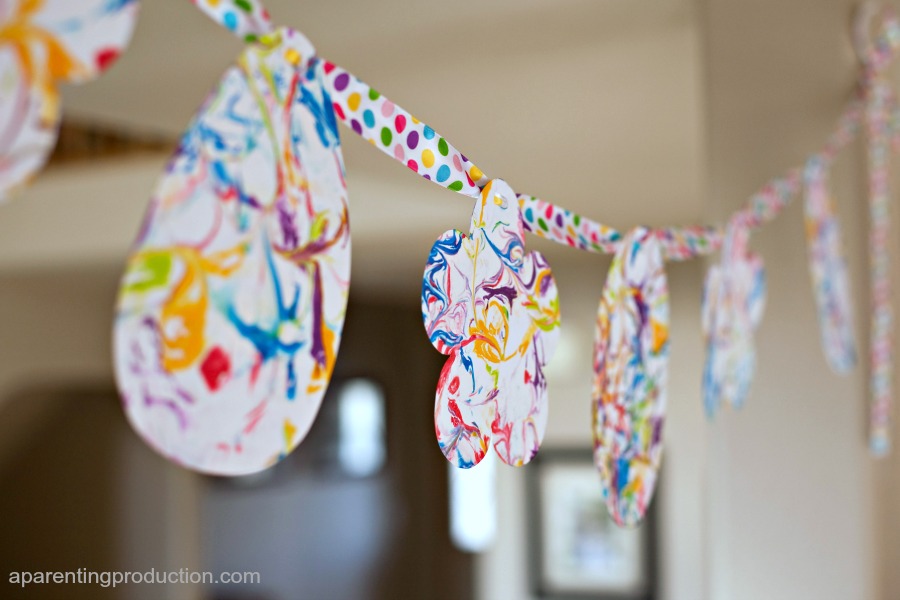
5. If you would like to take the craft one step farther punch two holes in the top of each shape and lace ribbon through the make a festive Easter garland to decorate with.

love this!!! Totally trying it with my kids!
My girls will love to do this!